
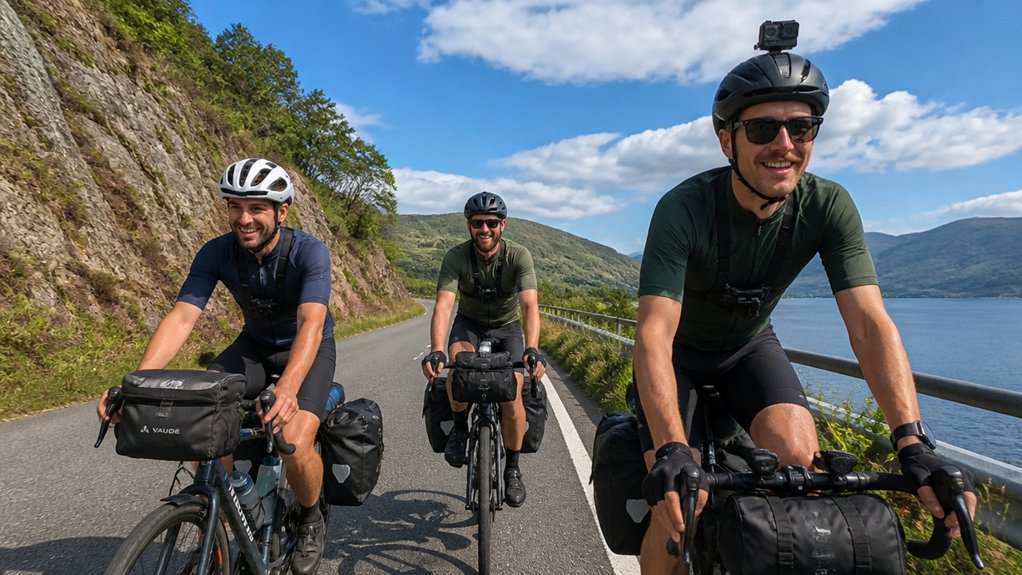
When you roll out on tour, your GoPro mount shapes the whole story. A helmet shows what you notice. A chest mount catches your hands, bars, and the road humming under your tires. A handlebar mount gives you that clean, steady ribbon of pavement ahead. Each one changes comfort, sound, and even what survives a rough patch. The best choice depends on where you ride and what you want people to feel next.
Key Takeaways
- For bike tours, handlebar or stem mounts usually give the smoothest, steadiest forward footage on paved roads and long-distance rides.
- Chest mounts are the best all-rounder for immersive touring footage, showing bars, hands, and road while reducing head-movement shake.
- Helmet mounts capture your eye-line and scenery but often feel shakier, exaggerate glances, and add wind exposure and helmet weight.
- On mixed pavement and gravel tours, switch between handlebar for smooth sectors and chest for rougher sections needing more stable body-linked footage.
- Use short, rigid mounts, tight clamps, stabilization, spare batteries, and a large memory card for the most reliable tour setup.
Best GoPro Mount for Bike Touring

If your goal is smooth footage that lets the landscape shine, a handlebar or stem mount is usually the best GoPro mount for bike touring. You keep the camera off your body, so the horizon stays calmer and the footage feels clean on long paved days. A solid handlebar mount also lets mountain light, rolling fields, and quiet town streets take center stage without constant bounce.
If you want a more immersive angle, pack a Chest Mount too. It shows your hands, bars, and pedaling, which adds energy without the dizzy sway you often get higher up. For tours that mix pavement and rough gravel, switching between the two is smart and simple. Just secure every clamp well, turn on stabilization, and bring spare batteries plus a big memory card. For even steadier results on mixed surfaces, use GoPro stabilization to smooth out small vibrations and road chatter.
Best GoPro Mount for Road Cycling
For most road rides, a handlebar or stem mount gives you the best GoPro angle. On smooth pavement, it keeps the camera off your body and delivers steadier forward footage, with lane lines, passing traffic, and distant hills all sitting nicely in frame. Pair your handlebar setup with in-camera stabilization, and long miles look calmer and cleaner. To improve results even more, focus on steady footage by choosing smooth roads and minimizing vibration wherever possible.
If you want a more personal view, a chest harness shows your hands, bars, and spinning cadence. That can feel vivid, but in a low aero position it often points too far down. A helmet mount captures exactly where you look, which is great for scenic descents or quick ride commentary, though every glance can add bounce. For touring ease, use a quick-release clamp, carry spare batteries, and test your angle before rolling out.
Best GoPro Mount for Gravel Riding
On gravel, you’ll want a mount that stays calm over washboard chatter, loose stones, and those sneaky ruts that make your bars buzz. A chest mount often gives you the steadiest view, while a bar or helmet mount can trade a bit of smoothness for a wider look at the road, the horizon, and the way the bike moves under you. You’ll also want to balance comfort and safety, because the best setup should feel easy to wear, quick to swap, and solid enough that you can forget it’s there until the next great stretch of dust and light. Knowing how to use gears can also help you keep a smoother cadence on rough gravel, which makes your footage look more controlled.
Stability On Gravel
Usually, the chest mount gives you the steadiest GoPro footage on gravel because your torso absorbs a lot of the chatter that makes rough roads look like a paint shaker. You’ll notice fewer jolts from washboards, loose stones, and potholes because your body smooths out the worst hits before they reach the camera.
A handlebar mount can still work if the road stays fairly even, but rougher gravel sends fork buzz and bar vibration straight into the footage. Keep the mount short and close to the stem so it won’t flex like a tiny diving board. A rubber damping insert helps too. If you hit a flat tire during a Maui bike tour, a chest mount also keeps your camera secure and out of the way while you stop to deal with it. Helmet setups bounce the most, since every glance and line change adds twitchy shake. On long tours, use chest mount clips for rough sectors and switch when the road calms down.
Best POV Options
Once you’ve sorted out stability, the best POV comes down to what you want people to feel when the gravel starts to hiss under your tires. For most riders, a chest mount gives the richest sense of being there. It shows your bars, arms, and the pale ribbon ahead, so viewers feel the rhythm of washboard and dust without too much head-led twitch.
If you want a true eye-line view, a Helmet Chin Mount captures exactly where you look when the road gets loose or technical. It makes line choice easy to read, though quick glances can feel busier. A handlebar or stem mount works well for smooth sectors and big scenery. For mixed tours, pair chest or helmet footage with a quick-release bar mount. On long descents, remember that beginner downhill riding tips like relaxed braking and smooth body position can also make your footage look calmer and more controlled. Shoot 4K/60 with HyperSmooth on.
Comfort And Safety
Because gravel miles can stretch all day, comfort and safety matter just as much as the view. A chest mount usually feels best on long rides because it spreads weight across your torso and avoids neck strain. It also smooths rough chatter better, so your footage looks calmer when the road turns washboard and dusty.
A helmet mount gives you that true eye-level glance at lines, hills, and passing pines. Still, rough gravel makes every head bob, brake check, and quick scan show up, which can feel jumpy for viewers. Safety has trade-offs too. A camera on your helmet adds mass to the shell. A chest harness puts a rigid case on your sternum. Keep either setup low-profile, secure, and ideally quick-release. Your ribs will thank you later. If shaky footage tends to make you queasy, reducing vibration can also help prevent motion sickness on long downhill tours.
Best GoPro Mount for MTB Trails
On MTB trails, you’ll usually get the best results from a chest mount because it keeps the camera steadier and shows your bars, body movement, and the rough rhythm of the trail. A handlebar mount can look clean and solid on smoother cross-country paths, but once you hit rocky singletrack, every hit through the fork can turn the footage into a jittery rattle. If you want video that still feels wild without making your viewers seasick, it’s worth comparing those two setups before your next dirt-filled ride. If you’re unsure which setup will feel most comfortable, your skill level and riding experience can also influence how confidently you handle rough trails with a camera mounted.
Chest Mount Advantage
For rough and rooty MTB trails, a chest mount gives you one of the most useful GoPro views you can get. You capture a stable POV close to your torso, so your bars, hands, and pedaling stay in frame while the trail chatters beneath you.
- A chest mount cuts jitter from quick head turns.
- You get clear views of line choice and body position.
- The harness spreads weight across sternum and shoulders.
- Long rides feel easier than with a helmet setup.
- A snug fit and app check help control bounce.
That mix makes footage great for skill review and coaching. You can actually see how you steer through rocks and roots. On very low, aggressive positions, the mount may block some scenery, but on technical singletrack, it’s often the smartest seat in the house. While filming on public roads or mixed-use routes, remember Maui riders also need proper bike lights when conditions require them.
Handlebar Stability Tradeoffs
While a handlebar or stem mount can look like the easy stability win, that advantage shifts fast once your tour leaves smooth pavement and drops into rooty singletrack. On calm roads, your bars move less than your head, so footage often looks steadier. HyperSmooth can clean up the small buzz from steering and fork flex too.
Hit rough MTB trails, though, and the handlebar starts sending every knock straight into the camera. You’ll see low wobble, sharp spikes, and that jackhammer chatter from roots and rock gardens. A short, rigid mount helps most. Clamp it tight on the stem, use rubber inserts, and skip long extension arms that act like tuning forks. Extra stabilization helps, but it won’t erase big hits. For mixed tours, mount low and centered, and carry one solid setup per bike. On long descents like the Haleakala downhill, even a stable handlebar mount can amplify vibration over rougher sections as the grade and speed build.
Why Chest Mounts Work for Bike Touring
Because it sits at the center of your body, a chest mount gives bike touring footage a steady, bike-linked point of view that feels more alive than a plain bar shot. You get a stable POV that naturally includes your bars, hands, and top tube, so viewers feel the road hum and each small correction.
- Your torso smooths out head twitch, especially on rough shoulders.
- Pedaling cadence shows clearly, along with shifts and body movement.
- That makes coaching clips, vlogs, and immersive edits easier to cut.
- Jackets, backpacks, and aero positions can force angle tweaks mid-ride.
- A rigid case may hit your sternum hard in a crash.
On longer rides like Maui bike tours, that stable, body-centered angle can make extended descent footage feel smoother and more engaging to watch.
If you don’t mind occasional setup fiddling, a chest mount often balances realism, smoothness, and storytelling better than simpler options on long tours.
What Helmet Mount Footage Looks Like

With a helmet mount, you show the ride at eye level, so viewers see the road, the horizon, and whatever catches your glance along the way. That first-person view feels vivid, but it also follows every nod, quick pan, and bump, so the footage can get shaky unless your stabilization works hard. You also notice a trade-off: you capture where you’re looking, not much of the bike, so your bars and hands may slip out of frame. On Maui descents, first-time safety matters because sudden head checks or scanning the road can make helmet-mounted footage even more erratic.
Eye-Level Perspective
A helmet mount puts viewers right behind your eyes, so the footage feels like a true rider’s-eye window onto the tour. That eye-level perspective matches what you actually see, which makes scenic roads and approaching traffic feel immediate and true. A chin-mounted helmet mount usually frames the road more naturally than a top mount, with less empty sky.
- You show the same sightlines you follow on the ride.
- Distant mountains, bends, and traffic read clearly ahead.
- Your hands and controls usually stay out of frame.
- Wind hits the camera harder up there.
- Higher settings like 4K/60 help stabilization keep detail.
You’ll often want HyperSmooth or gyro stabilization to keep textures usable after correction. That makes helmet POV a strong pick for scenic tours and motovlog style storytelling, even if your bars stay mostly offstage. On Maui bike tours, following helmet guidelines also matters for safety when choosing this mounting option.
Head Movement Effects
When you mount a GoPro on your helmet, the footage follows every glance you make, so a quick check over your shoulder can swing the whole scene in an instant. That immediacy feels lively, but the helmet mount makes every small movement bigger on screen. Tiny shifts in the riders head can tilt the horizon and send the frame bobbing with each pedal stroke or rough patch.
You’ll notice this most on choppy roads, where high-frequency bumps ripple through the clip unless stabilization works hard. On long descents, constant helmet movement can make you more aware of braking tips and hand fatigue if you keep scanning the road and scenery. A chin mount usually looks steadier and lower, so you capture more road, bars, and texture instead of extra sky. Helmet footage also catches side looks and passing scenery naturally, though some viewers may feel a little seasick. It’s exciting to watch, but less useful for studying technique closely.
Bike Visibility Limits
Even though a helmet mount seems like the obvious rider’s-eye view, it often leaves the bike itself out of the picture. You’ll usually capture sky, pavement, and the road ahead. If you tilt helmet mounts downward, you may only get the top tube and headset, not the bars you hoped for. On scenic descents like a Maui bike tour, that can make sweeping road views look exciting while still giving viewers very little sense of the bike in the shot.
- Eye-level footage rarely shows your bike clearly
- Head turns add jitter and sudden framing changes
- Rough roads make the view bounce and wander
- Aero posture can aim the camera at stem and ground
- Chin-bar mounts or chest mounts show bars and motion better
That’s why viewers can lose their sense of where the bike sits in frame. If you want both scenery and bike reference, pair a helmet camera with another angle. Your footage will feel fuller, steadier, and easier to follow.
When a Handlebar Mount Works Best
On smooth road tours, a handlebar mount often gives you the cleanest, steadiest footage with the least fuss. You’ll notice it most on paved routes with a stiff stem, where the camera stays aligned with your bike and your point of view feels calm and natural. A standard clamp fits most bars or stems, pops on fast, and rotates 360 degrees for easy reframing.
This setup shines when you want scenic, dash-cam style recording without wearing anything on your body. On shared roads, keeping your setup simple can help you stay more aware of safe cycling conditions around drivers and shoulders. You avoid helmet pressure, chest straps, and your arms drifting into frame like uninvited extras. A stem or top-tube position keeps the horizon tidy and the front wheel in view. Add HyperSmooth or rubber inserts to tame leftover buzz from rough patches, high speed, and occasional chatter on descents.
Which GoPro Mount Is Most Stable?
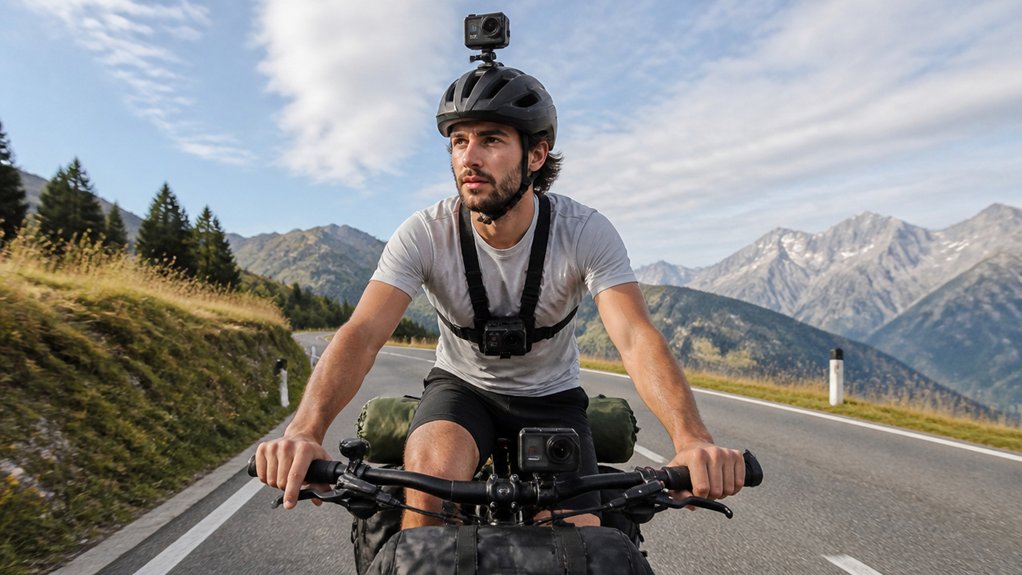
Usually, the chest mount gives you the most stable footage, especially once your route turns rocky, washboarded, or full of small hits that make a bike chatter. It rides with your torso, so you smooth out quick head movements before they reach the camera. On rough roads, that usually beats a helmet mount.
- A chest mount filters rapid jostles well.
- A handlebar mount can look very steady on smooth pavement.
- Rough surfaces send fork buzz into the bars.
- Helmet mounts add shake and horizon tilt fast.
- Shorter arms and damping parts help a lot.
When you’re filming on a descent, shooting while moving works best when you keep your upper body relaxed and let the chest mount absorb trail chatter naturally. You can improve any setup with HyperSmooth and software correction, but those tools work best on small vibrations. They won’t fully rescue big helmet jerks. If conditions change, swap mounts to match the terrain and keep your footage calmer overall.
What Each Mount Puts in Frame
Start with the frame, because each mount tells a different version of the same ride. A helmet view shows what you look at: road, horizon, traffic, signs, and sudden turns. It feels direct and alert, but you usually won’t see your bike or hands unless you tip the camera down a bit. On long descents like the Haleakala bike tour, that wider helmet perspective can also help capture road conditions and your surroundings clearly. A chest mount puts your handlebars, arms, and top tube in view, so your connection to the bike stays visible. A handlebar or stem mount centers the road ahead and often the front wheel, which works well for scenery and street detail. Low mounts near the frame create dramatic wheel shots and fast-moving foreground texture, though cables can sneak in. Chin-bar mounts split the difference. Wrist mounts feel lively, but framing often wanders and tilts unexpectedly.
How Riding Position Changes the Angle
Shift your posture and the camera angle changes with it, sometimes more than you’d guess. On an aero road fit, your chest mount often tilts toward the top tube and headset. You see bars and near pavement unless you tip it up 10 to 15 degrees.
- Go lower in your torso and chest footage drops toward the wheel.
- Helmet mounts sit 250 to 350 mm higher, so you catch more horizon.
- That height also boosts head bob, often 2 to 3 times more yaw and pitch.
- handlebar/stem mounts stay steady on the steering axis and sit 150 to 300 mm forward.
- A tiny 5 to 10 degree tweak can shift the horizon from missing to centered.
When you climb while tucked, your helmet can stare at the road right in front of the tire. On a long descent like a Haleakala bike tour, small posture shifts can noticeably change what your GoPro captures from one segment to the next.
Most Comfortable GoPro Mount for Long Tours
For long tours, comfort often matters more than the last bit of cinematic flair. If you’re riding all day, a chest harness usually feels better than a helmet mount. It spreads the GoPro’s weight across your torso, so your neck doesn’t spend hours arguing with a camera. That matters even more if you’re using a heavier setup.
On a warm Maui ride, choosing what to wear thoughtfully can also reduce irritation and make a chest mount feel better over a full day. Helmet mounts can feel fine at first, then slowly turn your head into a tired weather vane after a few hours. Handlebar mounts win pure body comfort because they put nothing on you at all. Still, rough roads can send vibration straight into your footage, so stabilization helps. Keep your full setup light, skip extra housings when you can, and you’ll notice the difference by the second coffee stop on long, dusty roads.
GoPro Mount Safety in a Crash
Before you clip on a GoPro, think about what happens if you hit the pavement, because a helmet mount adds hard edges and extra weight right where you need smooth protection. A chest mount can feel stable on long miles, but in a hard crash that rigid case can press into your sternum like a small blunt tool. You’ll also want to remember that most mounts don’t pop off in some neat, movie-style breakaway, so safer low-profile options and a backup tether are worth a close look. On a cold summit ride like Haleakala, bulky layers and gloves can also affect how securely a mount sits and how quickly you can remove it if conditions change.
Helmet Impact Risks
While a helmet mount gives you that dramatic rider’s-eye view, it also changes how your helmet behaves in a crash. Your camera adds mass and creates a protrusion. That can increase twisting forces on your head. It can also focus impact into one small area.
- Most adhesive mounts aren’t part of helmet safety certification.
- A rigid housing may not pop off when you need it to.
- Some mounts crack unpredictably and still transfer force into the shell.
- Top-mounted setups create more leverage and snagging risk in a slide.
- chin-bar mounts sit tighter to the profile, but they still aren’t crash-certified.
If you use a helmet mount, keep it low profile and simple. When roads get rough or speed climbs, you may want footage from bars instead. Your helmet already has one job.
Chest Mount Hazards
Even though a chest mount feels tidier than a helmet setup, it puts a hard little box right over your sternum. In a fast crash, that chest-mounted camera can focus impact into one small spot and raise force on ribs or breastbone. Unlike helmets, chest harnesses aren’t certified to pop free safely.
You can lower the risk with a soft-shell or low-profile mount. Add padding or a spreader plate, and skip bulky housings over the center of your chest. Move the camera slightly off-center or lower on your torso, and tighten the straps so it doesn’t flail around like a tiny wrecking ball. In really bad crashes, the mount may snap or stay attached. If impact breaks a rib, you’ll likely face other injuries too.
Best GoPro Mount If You Use One Camera
Narrow it down to what you want your one camera to do most, because no single mount nails every kind of bike-tour footage. If you want the best all-rounder, pick a chest harness. It shows your bars, hands, and a slice of the road, which makes viewers feel along for the ride. It also smooths chatter better than a helmet and feels easier on long days.
If you only buy one mount, a chest harness gives the most immersive, balanced bike-tour footage.
- Choose helmet if eye-level POV matters most.
- Expect more shake from head turns and scanning.
- Use HyperSmooth plus 60 to 120 fps.
- Pick chest harness for mixed terrain and engagement.
- Choose handlebar for scenic roads and easy charging.
A handlebar mount suits long paved stretches, cafés, and stops. It stays out of your way. Still, if you only buy one mount, chest usually gives you the richest daily footage overall.
GoPro Mounts Worth Packing on Tour
Pack for variety, because a bike tour gives you more than one kind of good shot. Bring a handlebar or stem mount that fits 9 to 35 mm bars for steady, hands-free road footage. It pops on and off easily when you swap bikes, and it records the lane ahead, passing traffic, and long scenic miles.
Add a chest harness for a more immersive view. You’ll catch your bars, hands, and pedaling, which looks great on climbs and rough roads where helmet shake gets annoying. A low-profile helmet mount gives you eye-level shots and easy head pans, though it moves more and feels awkward in cafés. Pack curved and flat adhesive mounts, a quick-release buckle, an extra pivot arm, spare batteries, a USB-C power pack, and a 64 GB microSD card.
Frequently Asked Questions
How Do Weather Conditions Affect Different Gopro Mounts on Multi-Day Bike Tours?
Weather changes how your mounts perform: helmet mounts catch more wind noise and crosswind wobble, chest and bars collect spray, need better moisture protection, bars shake on rough roads, and cold drains exposed batteries faster.
Can Helmet, Chest, and Handlebar Mounts Interfere With Bike Lights or Bags?
Yes, like threading a needle at dusk, you’ll find helmet, chest, and handlebar mounts can cause helmet obstruction and bag interference. You’ll need 30–50 mm clearance, mock-fit lights and bags, and sometimes relocate accessories.
Which Mount Is Easiest to Remove Quickly During Café Stops or Border Crossings?
You’ll remove a handlebar mount fastest during café stops or border crossings, especially with a quick-release clamp. A quick release helmet setup removes slower, and a detachable chestmount usually takes longest to unstrap and stow.
Do Local Laws Restrict Helmet or Handlebar Camera Mounts While Cycling?
Yes, local laws can restrict mounts while cycling. You should check helmet restrictions and handlebar regulations where you ride, because rules vary widely, and authorities may object if your camera creates hazards, obstructs equipment, or compromises privacy.
How Do Battery Swaps and Charging Differ Between Helmet, Chest, and Handlebar Mounts?
You’ll find chest mounts easiest for battery management and hot swapping, handlebar mounts best for charging with power adapters, and helmet mounts slowest. You can carry spare batteries anywhere, but charging cables work poorly on helmets.
Conclusion
Pick the mount that matches your road and your story. If you want one camera to do almost everything, choose the chest mount for stable bars, steady breathing, and the grit of long miles. On smooth pavement, the handlebar mount gives you a calm forward view and easy all-day comfort. For sweeping descents and quick looks at alpine lakes or dusty switchbacks, the helmet wins. Three mounts, three moods. Pack smart, ride light, and let the route speak.


