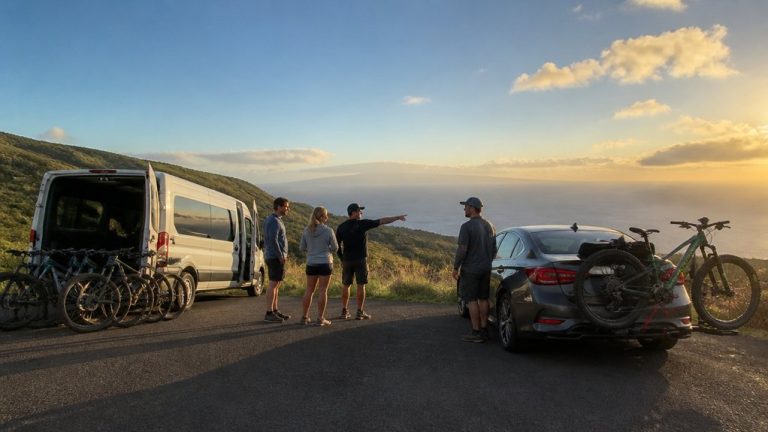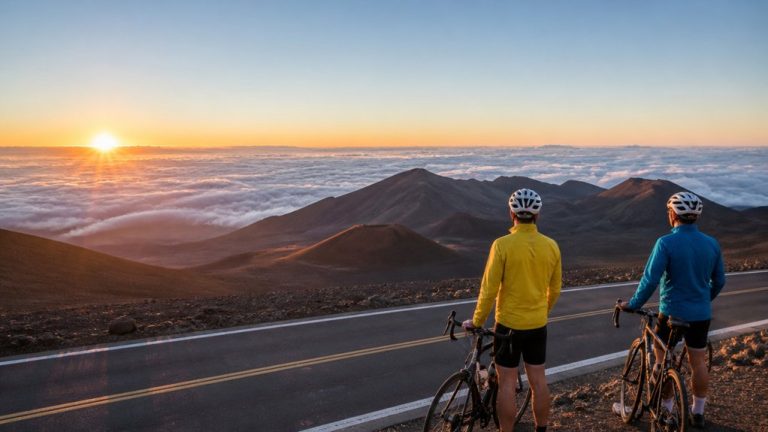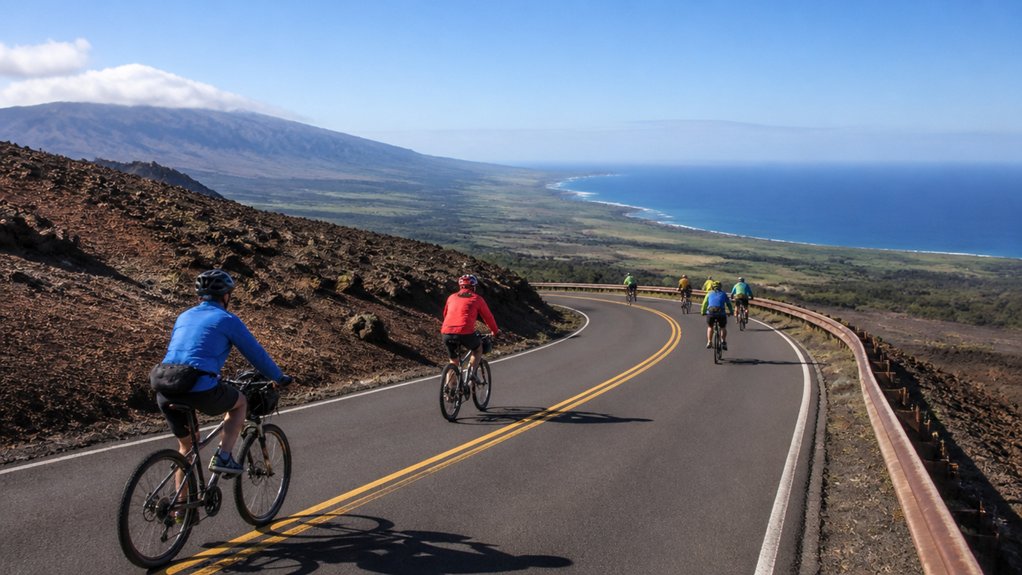
At 6,500 feet, the first turn can feel like you’ve tipped into a moving postcard. You check in at Paia, load into a van, and start a mostly downhill coast through cool mist, eucalyptus scent, tight switchbacks, and wide ocean views. It sounds easy until the weather flips, the shoulders narrow, and your speed creeps past 30 mph. Before you book, you’ll want to know who this ride suits, what the safety rules actually mean, and where the best stops wait.
Key Takeaways
- Most Paia bike tours begin with check-in in Paia, then a van shuttle to about 6,500 feet for a mostly downhill 20–26 mile ride.
- Expect changing conditions from cold misty elevations to warm coastal air, with scenic switchbacks, ocean views, Kula, Makawao, and a finish near Paia.
- Riders should be comfortable braking on long descents, handling hairpin turns, and sharing paved roads with traffic and narrow shoulders.
- Tours generally suit ages 15 and up, require closed-toe shoes, and are not recommended for pregnant riders or anyone over 300 pounds.
- Plan for about 3–6 hours total, bring water, snacks, and warm layers, and choose guided tours for support or self-guided rides for flexibility.
Is the Haleakala Bike Tour Worth It?

Why do so many Maui visitors say the Haleakala bike tour from Paia is worth it? You get a long, mostly downhill ride that feels cinematic without demanding pro-level legs. The Haleakala Bike route usually starts around 6,500 feet, then rolls through switchbacks, cool upland air, Kula, Makawao, and finally breezy Paia.
What makes the Haleakala downhill memorable is the constant change. One minute you’re zipping through mist in a jacket. Later you’re peeling layers as palms appear and the ocean gets louder. You can stop for photos, coffee, or a quick look around town, so the ride feels adventurous but manageable. Many operators provide a step-by-step guide to the day so you know exactly what happens from check-in to the final ride into town. Tours also keep logistics simple with bikes, helmets, waivers, and support options. Just check current park fees, route pickups, and weather, because Maui likes to keep you guessing a little.
Who Is the Haleakala Bike Tour Best For?
Picking the right rider matters on the Haleakala bike tour from Paia, because this isn’t just a lazy coast with pretty views. You’ll enjoy it most if you’re steady on curved roads, confident with hand brakes, and okay with cold wind after climbing Haleakala by vehicle. The Downhill Ride suits a huge age and fitness range, since you mostly coast. If you’re unsure about braking or mountain-road confidence, a guided van tour can be a better fit for the same scenic experience.
| You are… | Great fit? | Why |
|---|---|---|
| Confident rider | Yes | Switchbacks, speed, hand brakes |
| Scenic explorer | Yes | Self-paced stops in Kula, Makawao |
| Pregnant, under 15, over 300 lbs | No | Safety rules apply |
You’re also a good match if bucket-list scenery thrills you, and you’ll pack water, basic spares, and warm layers. If you want hand-holding, this may feel a little too independent.
How Does the Haleakala Bike Tour Work?
You’ll usually meet near Paia, then ride by van to the launch point above town, or all the way to Haleakala’s summit if you’ve booked a sunrise start and don’t mind a 3:00 am wake-up. From there, you coast downhill for miles through cool mountain air and quiet switchbacks, with guided tours setting the pace and self-guided options letting you roll when you want. Either way, you get a safety briefing, a helmet, and backup if something goes sideways. Tour operators also share pickup details and timing in advance, which can vary depending on whether your ride starts from Kahului or another nearby meeting area.
Tour Start Process
Before the coast wakes up, the Haleakala bike tour usually starts at the bike office in Paia, where you check in, sign waivers, get fitted for a helmet and a wind or rain jacket, and hear the safety briefing. You’ll Meet at the bike office in Paia in this small village, often around 8:45 a.m., though sunrise rides begin much earlier, closer to 3:00 a.m.
Staff check and tune your bike before departure, then review the rules. You need closed-toe shoes and confidence using hand brakes. Age and weight limits apply, and you can’t ride while pregnant. Most tours include a van shuttle to the start area near 6,500 feet before the downhill ride begins. After that, you load into a van for the uphill shuttle to the start area near 6,500 feet. The air feels cooler there, with eucalyptus scent and quiet roads waiting ahead for your ride down.
Still comparing Haleakala Bike Tour From Paia: What To Know?
Ask for tour ideas, hotel suggestions, or a simple trip plan that combines both.
Trip Helper
Guided Vs Self-Guided
Once the van drops you near 6,500 feet, the big choice is how you want the ride to unfold. A guided tour keeps you with a small group, a lead guide, and a sweeper van behind you. You get commentary, planned stops, and extra backup, but you follow the group’s pace and clock.
A self-paced bike option feels freer. After the narrated drive up, you get instructions, phone support, and the road. Then you can coast through cool eucalyptus air, pause in Kula, or grab coffee in Makawao when it suits you. If something goes wrong, you call the bike office and request pickup. Mid-morning rides usually meet around 8:45 a.m. and launch after a 45-minute drive. Guided rides cost more, especially sunrise options entering the national park too. Many companies offer both guided or self-guided Haleakala bike tours, so the best fit depends on how much structure and support you want.
Should You Choose Guided or Self-Guided?
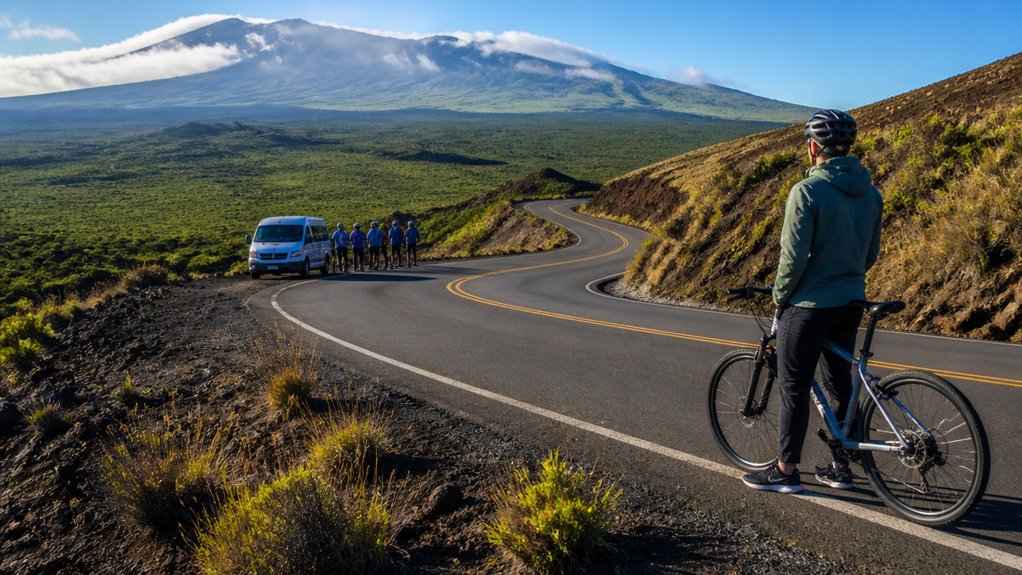
You’ve got two solid ways to ride, and the best pick comes down to how much support you want and how much freedom you’d like on the road. A guided tour gives you a leader, commentary, and a sweep van, while a self-guided ride lets you set your own pace and linger at Kula, Makawao, or a quiet photo pullout. As the cool air shifts to warm pavement and birdsong gives way to spinning tires, you’ll want to decide whether you’d rather follow the plan or write your own. Comparing shuttle or self-drive options can help you figure out which setup fits your comfort level, schedule, and riding style best.
Support And Flexibility
If you like a little backup with your big views, a guided Haleakala bike tour gives you a lead guide, a sweeper van, and a set rhythm for the ride down. That support matters when the road feels long, the air turns cool, or you just want someone else handling logistics. Most guided tours meet around 8:45 am, then head uphill by van with commentary before the ride begins. This later tour start time helps separate guided bike departures from the much earlier sunrise trips many visitors expect.
- You get a lead guide plus a sweeper/relief van with spare gear and pickup help.
- You hear useful narration and have immediate assistance if something goes sideways.
- You trade some freedom for structure, which can feel reassuring on a big descent.
Self-guided rides still start with briefing and drop-off, but after that, it’s just you, the bike, and phone support from town.
Pace And Stop Control
Set the tone early, because pace is where guided and self-guided Haleakala bike tours really split apart. On guided tours, you roll with the group, hear commentary, and follow planned stops and timing. A sweeper and relief van stay in play, which can feel reassuring if you like structure and extra eyes on the road.
With self‑guided rides, you call the rhythm. After the narrated drive-up and drop-off, you coast at your own speed, pull over for photos, and linger in Kula, Makawao, or Paia without group pressure. Mid-morning launches usually start around 8:45 am, and the downhill often takes about 2 to 3 hours. Some operators also bundle a bike tour with breakfast, which can shape how long you want to stop before riding into town. Choose guided if you want oversight and stories. Choose self‑guided rides if you want freedom, longer pauses, and coffee when it smells too good.
Should You Choose Sunrise or Mid-Morning?
Usually, the choice comes down to what kind of morning you want. A Sunrise Tour gives you the summit experience, but you’ll wake around 3:00 am, pay about $100 more, and face temperatures roughly 30°F colder than Paia. You also won’t always get the postcard view. Sunrise visibility is often a coin flip.
- Choose sunrise if you want crater views, dawn light, and don’t mind the predawn drive.
- Choose mid-morning if you’d rather meet around 8:30 or 8:45 am and skip summit entry.
- Choose mid-morning if you want a cheaper, more relaxed descent and better timing for a later sunset or stargazing return.
If you’re curious and flexible, mid-morning often feels easier on your body and your budget. Fewer yawns are a nice bonus, too, after breakfast and coffee. For many riders, best time of day matters as much as price, since comfort and visibility can shape the whole experience.
Where Does the Haleakala Bike Tour Start?
You’ll usually meet in Paia near Baldwin Avenue and Hana Highway, where the bike shops and tour offices set an easy starting rhythm for the morning. From there, you’re headed uphill to the volcano launch point, with sunrise tours riding in a van into Haleakala National Park and mid-morning or self-guided trips starting just outside the park around 6,500 feet. It’s a neat two-part start: beach-town storefronts first, then cool mountain air and the quiet road waiting above. If you’re not staying nearby, planning your transportation options from South Maui or Kihei can make the early meetup much easier.
Paia Meeting Point
The day begins in Paia, where most Haleakala bike tours gather near Baldwin Avenue and Hana Highway, often by the bypass road beside the first parking lot on the west side of town or at the Paia bike office. This Paia meeting point feels easygoing, but you should still arrive early.
- Mid-morning and self-paced tours usually meet around 8:00 to 8:45 AM.
- Guided sunrise trips start much earlier, often around 3:00 AM.
- Nearby parking helps, but you’re responsible for getting yourself to Paia.
Give yourself a little extra time for waivers, helmet fitting, and any last-minute questions. Some operators list the Paia meeting point as the bike office or the bypass road near the first parking lot on the west side of town. You’ll hear vans loading up and bike racks clinking while the town wakes slowly. From this meeting point, your bike company handles the transport, so all you need is coffee, layers, and a little curiosity.
Volcano Launch Location
Momentum starts in Paia, where tour companies outfit riders at their bike offices before loading everyone into vans for the climb up Haleakala. You’ll usually meet near Baldwin Ave and Hana Hwy or at the bypass by the first west-side parking lot, then roll out after a quick briefing and helmet check.
For most mid-morning or self-guided rides, the actual bike launch sits around 6,500 feet, just outside the National Park entrance on Haleakala volcano. The van ride from Paia takes about 45 minutes. Most riders cover a 20- to 26-mile route, depending on the company and where the descent officially ends. If you book a sunrise tour, you’ll start much higher after driving to the summit inside the park at roughly 10,000 feet. That means a painfully early pickup, often around 3:00 am. The reward is crisp air, crater views, and a downhill that feels wonderfully long.
What Is the Haleakala Bike Tour Route Like?
Start in Paia and the route quickly trades beach-town ease for a steady climb upcountry, following Baldwin Avenue, Hana Highway, Olinda Road, Hanamu Street, Haleakala Highway, and finally Crater Road toward the summit area. On a Haleakala Bike ride, you either cover about 36 miles from sea level or start from a van drop near 6,500 feet and descend 22 to 26 miles back toward Paia.
From Paia’s shoreline, the road climbs steadily upcountry, linking Baldwin, Olinda, and Crater Road on Haleakala’s iconic bike route.
- High switchbacks open wide ocean and valley views.
- Kula and Makawao bring markets, coffee, and small-town character.
- Lower roads pass Rainbow Park and old plantation fields.
Some riders also explore Kula to Makawao routes that highlight Maui’s upcountry scenery and community stops. You roll on fully paved roads that range from smooth to mildly rough. Expect hairpin turns, some narrow shoulders, regular traffic, and maybe a cow cameo. Most riders finish in 3 to 6 hours with scenic stops.
How Hard Is the Haleakala Bike Tour?
You don’t need pro-level aerobic fitness for the Haleakala bike tour, since you’ll spend most of the 24 to 36 miles rolling downhill from about 6,500 feet to sea level, but you should be ready to sit on the bike for 3 to 6 hours with a few flats and short climbs mixed in. What really makes the ride challenging is your road sense: you’ll brake through steep switchbacks, manage speeds that can top 30 mph, and stay calm on open mountain roads where the wind has opinions. One reason it feels intense is the downhill grade, which can seem surprisingly steep in sections even though the route is mostly a controlled descent. If you’re comfortable with hand brakes, can handle cool air, long views, and a few practical details like snacks and spare tubes, you’ll likely find the tour demanding but very doable.
Fitness Level Required
Although people often lump every Haleakala bike trip together, the fitness required depends entirely on which version you choose. If you’re riding downhill from around 6,500 feet, you don’t need to be an athlete. You do need to be comfortable spending 2 to 4 hours on a bike, with a few short flats and gentle rises. Before you go, review some beginner downhill tips so you know how to handle braking, corners, and changing road conditions.
- Downhill tours suit many fitness levels, from teens to older riders.
- Summit climbs cover 36 miles uphill and demand steady endurance for hours.
- Weather shifts fast, so extra layers add weight and effort.
If you want the full ascent, you need to know it’s a serious workout. Low gearing helps, but above-average fitness matters more. You’ll also want food, water, electrolytes, spares, and maybe SAG support. Thin air doesn’t hand out freebies, especially near 10,000 feet.
Road Skills Needed
Picture the road unwinding beneath your wheels as Maui opens up below. This ride isn’t a mountain bike trail, but it does demand confident bike handling. While many ask about tour safety, the answer depends heavily on your comfort with speed, traffic, and downhill control. You’ll coast from roughly 6,500 feet toward sea level, often above 30 mph, with hairpin turns, narrow shoulders, and real traffic. You need steady braking, smart line choice, and focus.
| Skill | Why it matters |
|---|---|
| Braking control | Long descents heat hands and test judgment |
| Cornering focus | Switchbacks punish sloppy entries |
Clouds and rain can roll in near 5,000 to 6,000 feet, so manage layers without fumbling your controls. Know how to change a tube and carry basic spares since flats happen lower down. You must be at least 15, 4’11”, not pregnant, and ready to stop in Kula or Makawao if your hands need mercy.
Is the Haleakala Bike Tour Safe?
Start with the honest answer: the Haleakala bike tour is safe for most riders when you treat it like a real mountain descent, not a casual beach cruise. You don’t need elite fitness, but you do need steady Biking Safety habits and confidence with hand brakes on steep switchbacks where speeds can top 30 mph.
- Listen to your tour guide during the safety briefing and follow group spacing.
- Expect traffic, narrow shoulders, wildlife, and sudden cold mist above 5,000 feet.
- Check the rules: minimum age 15, at least 4’11”, closed-toe shoes, and no pregnant riders.
- Know the ride restrictions so you stay only on permitted sections of the Haleakala bike route.
Good operators monitor weather, use support vans, and enforce waivers and park policies. If you ride within your limits, respect the mountain, and stay alert when clouds roll in, the descent feels thrilling, not sketchy.
What Bikes and Gear Are Included?
Once you know the ride is safe in the right hands, the next question is what shows up with you at the curb in Paia. Most bike tours hand you a quality mountain bike and a properly fitted helmet. Operators service the bikes daily, so they usually feel tight, smooth, and ready for comfortable riding.
You’ll also usually get cold-weather layers for the summit and descent, often a poncho or light windbreaker. Some companies add gloves, and a few offer wind pants. Many riders also pack water and snacks so they stay comfortable and fueled during the long descent. Keep your own extras simple. Bring two tubes, a mini pump or CO2 inflator, and basic tools since flats can happen lower down. Lightweight layers work best because bulky wet gear can turn chilly fast on a long coast. You want protection, not a sweaty parachute billowing behind.
What Are the Age and Rider Requirements?
Before you roll out from Paia, it helps to know the ground rules for who can ride. The minimum age is 15 under Maui County rules, and if you’re under 18, a parent or guardian must ride with you. You also need to be at least 4’11” tall, weigh 300 pounds or less, and not be pregnant.
- You should feel confident riding on curved mountain roads and using hand brakes.
- You need closed-toe shoes, and you’ll complete forms and waivers at check-in on an honor system.
- If you need assistance with basic bike handling, this probably isn’t the right outing.
These rider requirements are in place to help make sure everyone on the Haleakala Bike Tour is prepared for the route and conditions.
This isn’t a beach cruiser spin. You’ll be coasting through cool morning air with winding pavement below, so steady focus and solid road sense matter a lot. Safety comes first here.
How Long Does the Haleakala Bike Tour Take?
How long should you set aside for a Haleakala bike tour from Paia? Most riders should plan on a 3 to 6 hour block for the full activity. Your actual downhill bike tour usually lasts about 2 to 4 hours on the road, covering roughly 24 to 26 miles back to Paia. Add time for check-in, a safety briefing, van transport, and gearing up.
If you book a mid-morning departure, you’ll often meet around 8:30 or 8:45 a.m. Then you’ll ride about 45 minutes in the van to the 6,500-foot start and spend 2 to 3 hours descending. If you choose a sunrise version, expect a much longer day. Note that the sunrise bike tour may not always be available, so current offerings can affect your schedule. Pre-dawn pickup, summit time, and extra driving can stretch the experience by several hours. Weather and your pace matter too.
Where Should You Stop Along the Ride?

Usually, the best stops come in a natural sequence as you roll from cool upland air toward Paia. If you bike down the volcano, pause early at the panoramic switchbacks. The unmarked pull-outs give you huge valley and ocean views, plus fast photo ops before the road pulls you onward.
- Stop in Kula after the switchbacks for water, coffee, or a quick snack near Maui Sunrise Market.
- Give yourself about 30 minutes in Makawao to browse small shops, peek into galleries, and grab a cookie from Maui Cookie Lady.
- If you want one more breather, detour briefly to Rainbow Park after Makawao for shade, a stream, and a waterfall snapshot.
These stops keep the ride varied, practical, and scenic right up to your finish in Paia town.
What Should You Do After the Ride?
Refuel first, because Paia is the kind of finish line that rewards you with salt air, good food, and a real chance to linger. Head to Paia Fish Market for blackened mahi mahi or opakapaka, or refuel with shaved ice and easy snacks along Baldwin Ave. Your legs will thank you.
If you want a gentle reset, stop at Rainbow Park or a nearby pullout for photos and a short walk after that 24 to 36 mile descent. On a self-paced tour, return your rental gear to the Paia bike office and call the company if you need pickup help or a spare tube. Want more? Detour to Makawao for artisan shops, Maui Cookie Lady, and an artsy half hour stroll. If skies clear, drive back up for Haleakala sunset and stargazing.
Frequently Asked Questions
Can I Bring a Backpack or Personal Items on the Tour?
Yes, you can bring small backpacks or personal items, but you’ll want to pack light. Use secure pouches for essentials like ID, snacks, meds, and a jacket, and store heavier gear in the van if available.
Are Photos or Gopro Mounts Allowed During the Ride?
Yes, you can bring photos gear and use GoPros if you follow mounting policies. Like chasing dawn, you’ll capture stunning views with helmet cameras, but you must stop safely, secure mounts, and obey guides’ safety instructions.
What Happens if It Rains or Weather Conditions Change?
If it rains or conditions shift, you’ll likely face colder, wetter roads, delays, or van-assisted rerouting. Staff may close sections for safety. Ask your operator about rain contingency plans, pickup options, and whether weather refunds apply.
Is Parking Available in Paia Before or After the Tour?
Yes, parking in Paia is your early-bird ticket. You’ll find Nearby streetparking and public lots near Baldwin Avenue, plus spaces by Paia Bay after rides. Arrive early; spots disappear fast. Tour operators often prefer Shuttle options instead.
Can Non-Riders Join the Van Portion Without Biking Down?
Yes, you can join the van portion without biking down. Ask about non rider pickup, reserve early, and expect a passenger fee. You’ll ride in the support vehicle, attend safety briefings, and arrange return transport if needed.
Conclusion
From Paia, you don’t just coast downhill. You follow a ribbon of road from cool upland air to warm sea breeze, with eucalyptus scent, rooster calls, red dirt, and bright ocean flashes keeping you company. If you like a little thrill with your scenery, this ride earns its place on your Maui list. Dress for quick weather swings. Listen at the safety talk. Then let Haleakala feel like a giant welcome mat unrolling all the way back to town.